




 Faded BerryFaded CreamFaded NavyFaded Rust


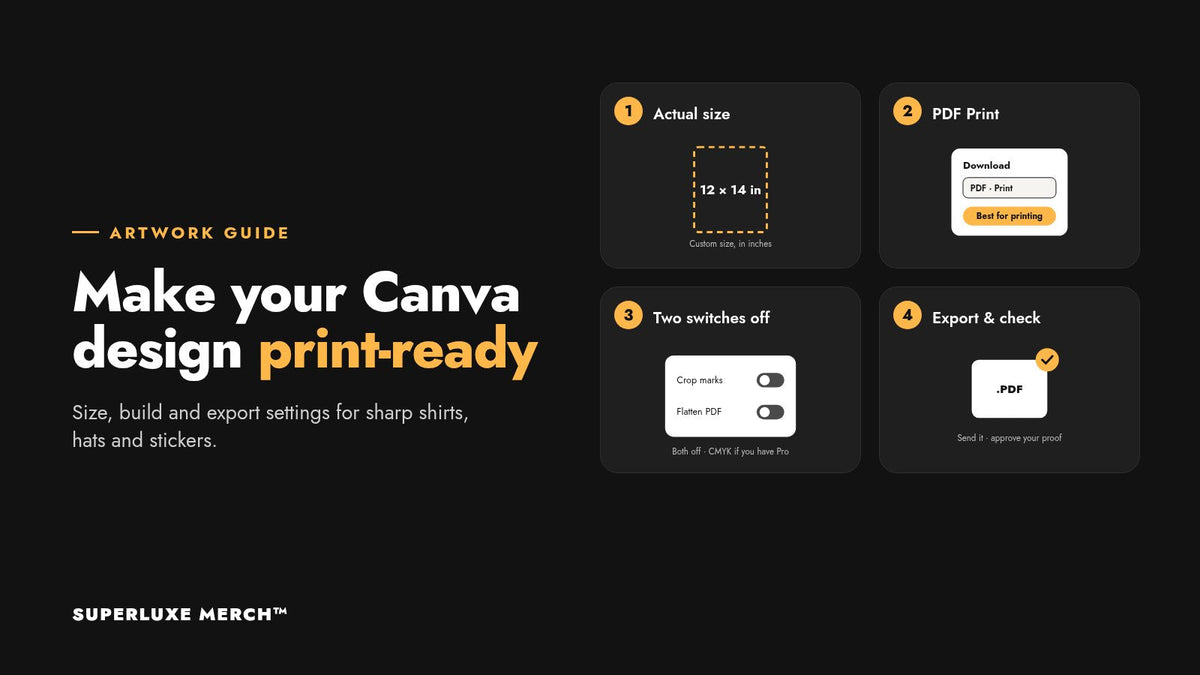
Canva is a fast way to lay out a shirt, hat or sticker design. Whether it prints sharp comes down to three things: the size you design at, how you build the art, and the export settings. Here’s exactly what to set.
1. Design at actual print size
Start with Create a design > Custom size and set the units to inches. Use the size the print will be on the garment, not a social post or letter page. A full front on an adult tee is usually around 12 × 14 in. A left chest is usually about 4 in wide. If you're not sure, use the full front size. Shrinking a large file is easy; enlarging a small one isn't.
2. Build it to print
- Use solid colors. Screen printing lays down one ink per color. Flat, solid fills print cleanest. Gradients, soft shadows and see-through effects can be printed, but they need extra prep. Tell us if your design uses them.
- Keep lines and small text bold. Zoom to 100% and look. If a line or a word is hard to read on screen at actual size, it won't hold up on fabric.
- Remove the background. A colored page background prints as a solid box. Delete it, or set it to white and export with a transparent background (see step 4).
- Use the fonts you mean to print. Canva's PDF export carries your fonts into the file, so text stays sharp.
3. Best: download a print PDF
Go to Share > Download, set the file type to PDF and pick the Print option (in some versions it's listed as PDF Print). Then:
- Crop marks and bleed: off. Shirts and hats aren't trimmed like paper, so marks only get in the way.
- Flatten PDF: off. Leaving it off keeps text and shapes as clean vector edges.
- Color profile: CMYK if you have Canva Pro. RGB is fine too. We match ink colors to your proof either way.
4. Or: a transparent PNG at full size
If you have Canva Pro, a PNG works too. Choose PNG, set Size to the largest option your design allows, and turn on Transparent background. Because the design is already at actual size, the PNG comes out large enough to print. Canva Pro can also export SVG, which stays sharp at any size.
5. Skip JPG
JPG can't be transparent, so you get a background box, and its compression leaves fuzzy edges around text and lines. Use PDF, PNG or SVG instead.
Quick checklist
- Canvas set to the print size in inches
- Solid colors, no background box
- Lines and small text readable at 100%
- Download as PDF (Print) with crop marks off and Flatten PDF off, or as a transparent PNG at full size
- No JPGs
Not sure it's perfect?
Send it anyway. We check every file before it prints. If it needs cleanup, art prep may apply, and we'll tell you before any work starts. You'll approve a digital proof before anything goes to press. Full file specs are on our artwork specifications page.



Leave a comment
This site is protected by hCaptcha and the hCaptcha Privacy Policy and Terms of Service apply.